This week we moved on from Straight TV makeup to focus on Halloween - there was a great atmosphere in the class, everyone was really getting into the spooky spirit! At one point there were 2 witches, a zombie and a cat in the hallway, it was an odd sight!
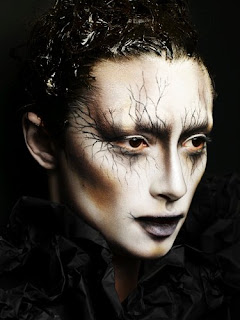
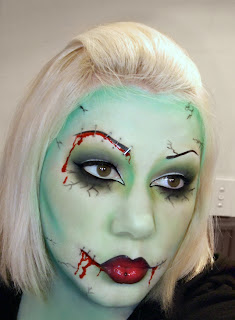
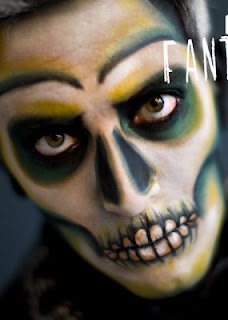
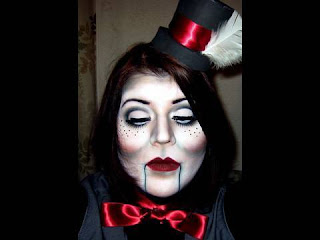
For my research, I wanted to find really unusual characters to create. It's difficult to be original when your choices are skulls, zombies, witches, etc, but I found a few really good pictures for inspiration!
I really liked the interesing mix of characters, and felt like I could create something a bit different with them. When researching for Halloween, I made sure to take note of the facial structures - I specifically chose characters that had a degree of highlighting and shading on the face. For our demo, Bella explained that the main skill we're learning to perfect here is how to change the shape of the face using highlighting and shading in a variety of ways - this is especially useful for Halloween characters, as the technique can be used to make a zombie face look gaunt and sunken, or the bones of a skull look like they're jutting out, etc. She told us how to do this with several different colours as well, so that when it was time for us to practise we would be able to create looks without limiting our colours. To highlight and shade, a mixture of black, grey, brown, white, and even yellow, red and green are used, and, if done correctly, can really create an interesting effect.
The following is my first attempt at Halloween makeup, done on my lovely model Leeanne:
I don't want to sound conceited, but I was really pleased with how this look turned out, and Bella didn't have a bad word to say about it either! It's based on the witch character above (first picture), which I found on the Illamasqua website. I love that it's a witch, but an unconventional one. To create this, I used greasepaints and applied using a sponge and brushes, then set it all with powder. I used a mixture of white, brown and black to create the look. I wanted her cheekbones to really stick out, so I shaded with brown just under the cheekbones and used my fingers to blend. I did the same on her temples, nose and chin, just to give her really sharp features. By shading dark on either side of her nose, I feel like it makes it look longer and thinner, and more witch-like. The eyes were the most diffcult part - as you can see from my research, the eyes have a winged effect and are darkened in at the nose to give her an evil look, so I tried to recreate this as best I could. I used brushes and my fingers, and I found it to be really delicate work! A steady hand is essential! I feel like I ended up with a very good effect, and I'm really happy with the blending and symmetry on her eyes. To finish, I used black on her lips with a dab of brown in the middle. To give them extra depth, I went beyond the natural line on the cupid's bow. Finally, I used a very thin brush to create the lightning bolts around her eyes and lips.
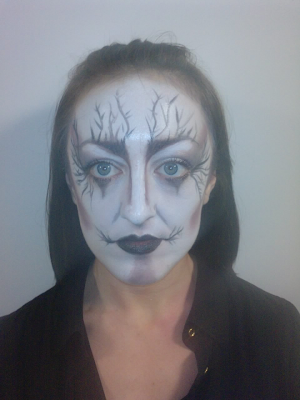
For my second attempt, I decided to do the creepy ventriloquist's dummy (the last picture at the top there). I was ready for assessment after doing the witch, but I felt I needed more practice on something very different before being assessed. Again, I used greasepaints, a sponge, brushes and my fingers to create the following:
I really loved doing this character, but I'm not as happy with it as the witch. I feel my symmetry is a bit off - if you look at the picture, you can see that the left side of her face (our right) has a few messy bits and my lines are a bit squinty, particularly on the eyelashes. But I still enjoyed doing it, and there are parts of the face that I really like! The cheeks for example, I spent the most time on because I wanted to get the shading just right. Bella suggested that next time I make her cheeks a bit redder, but apart from that I'm happy with them - I wanted to make her cheeks stick out, and the overall look is meant to reflect the plastic/wooden doll effect, and I think I captured that. I'm also really happy with her eyebrows (although the one on the left side needs to be tidied up for next time) and lips. As before, I exaggerated her natural lip line to make them more prominent. The black lines on her chin are meant to be the mechanism on the dummy which allows it to 'talk', and I do like the effect, but I need to straighten them up next time. Bella also suggested that I try doll-like lips next time, instead of filling in her whole lip area. I would like to try this to see how it would change the look, but also because it might be easier to make the lines straighter if I'm not having to go over the natural curve of her chin.
I really enjoyed Halloween week, it's been great to try something a bit more creative! More to come next week, assessment day!
Happy Halloween! :) x


very good
ReplyDelete